Week 10: Machines
Project: Rise of COVID/whack-a-COVID
Background
This week, I was trying to make a whack-a-COVID. Essentially, with the awfulness of COVID, I wanted to see if I could make a whack-a-mole but with COVID instead of a mole. You could also think of it as the rise of COVID: aka the COVID pandemic rose unexpectedly in 2020, just like how I'll make a corona rise unexpectedly.
I primarily wanted to do this because I thought it would be interesting to learn how to convert rotational motion to linear motion. This is also a challenge in terms of positioning, which a stepper motor would be helpful for. I consulted this video (https://www.youtube.com/watch?v=6BkYcqe8Vmo&t=54s (opens in a new tab)) for some inspiration as to some cartoons in terms of how to make linear motion from rotational motion.
I wanted to nail down the action of the corona randomly rising up and being able to go back to position.
Here is the final product (2X speed since the original file was too big to be made into a gif). I'll detail how I made this below.
For this week's project, I wanted to get my corona to rise up and down with a stepper motor (and at a random interval)
Stepper motor and breadboard
Stepper motors allow for smoother motion through incremental "steps." They can also carry a decent load and have good positional control. One of the cons, however, is that it is bulkier.
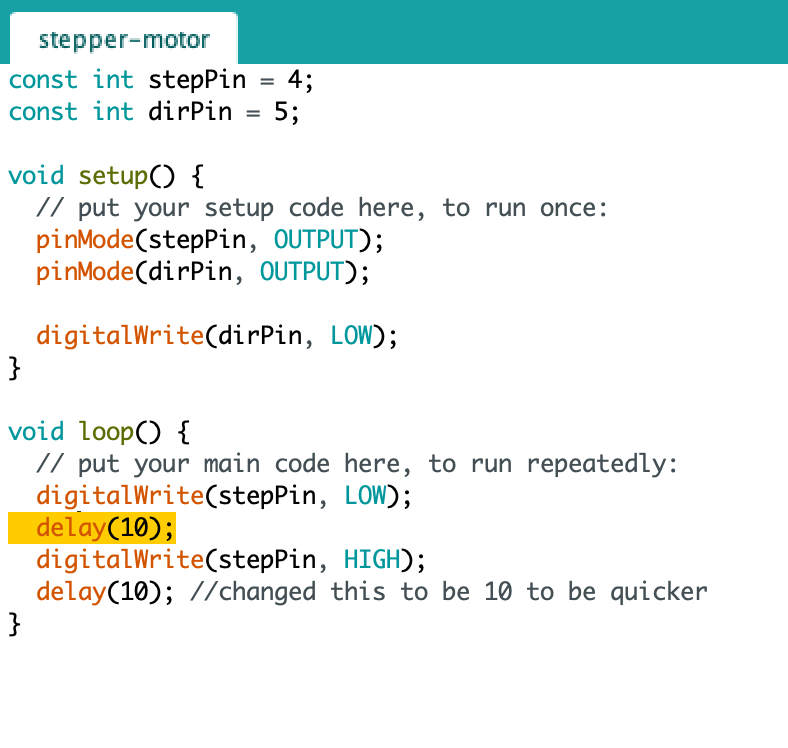
I first made sure that my Stepper motor could work and function. Here is a picture of my breadboard.
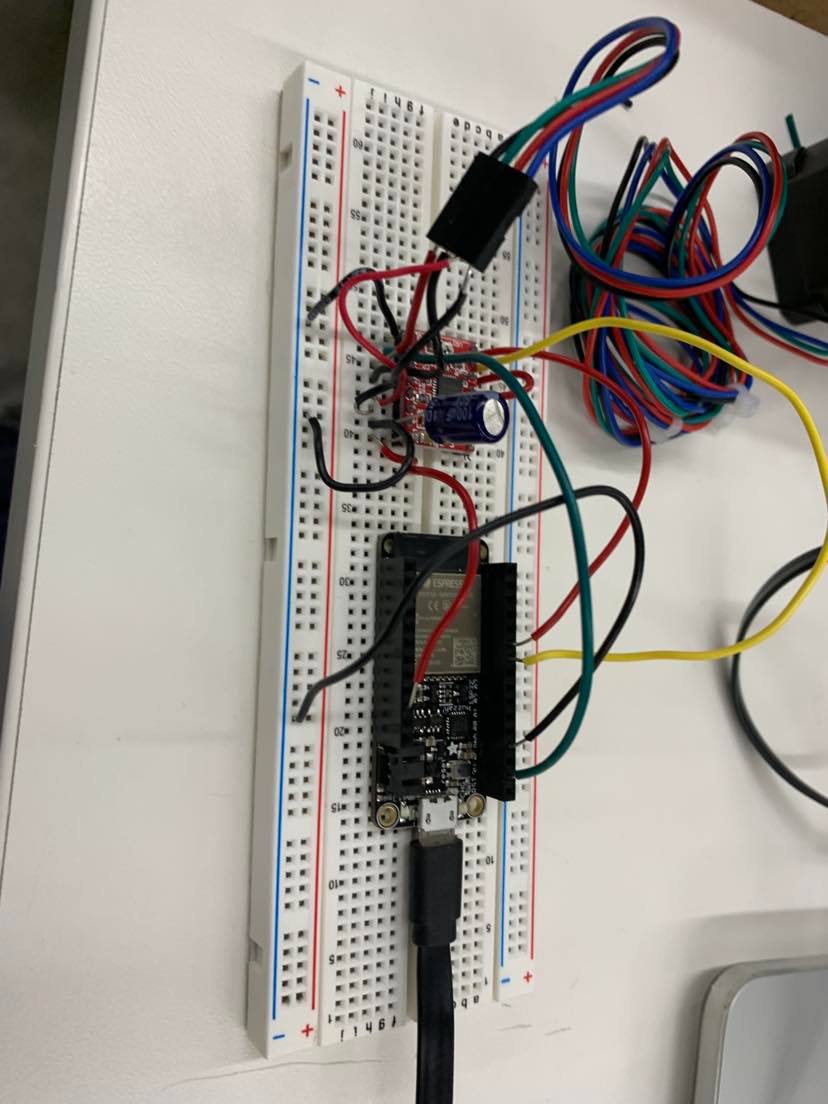
To note, my stepPin is 4, and my dirPin is 5. Moreover, I wired the breadboard (Kassia also helped me with this) so no external battery needed to be hooked up. You'll notice by looking at the image that I used an Arduino Feather. On the breadboard, there is also a capacitor and the driver (red). The wiring allows the code to be executed and tells the motor what to do and how many steps to take. This page (https://nathanmelenbrink.github.io/ps70/12_machine/steppers.html (opens in a new tab)) details the benefits of Stepper motors and the function of each component.
I made sure to select the correct output port and have the board be the Feather. Nathan's website here (https://nathanmelenbrink.github.io/ps70/10_networking/setup.html (opens in a new tab)) details how to set up to accept the Arduino feather.
Making the COVID virus, joints, and accessories
COVID
Here is the vector file I used for the virus: I found it off of the internet but essentially wanted to make sure it would be a simple outline. The holes are also a bonus feature. I then made a hole that could fit my screw. In my first version, I decided to just hotglue my virus to the rod instead because I thought there was no point in attaching it through a bolt. However, later on after I re-laser cut my corona virus with wood instead of corona, I decided to bolt it on instead to provide me with the flexibility of length.

When I ran this file, I did it with a speed of 100 and a power of 45 but since it took a while to cut, I think I could up the speed next time especially since I did it on cardboard.
After repeated prototyping and my struggles (that will be described in the later sections), I realized that I should laser cut it again with wood to be more sturdy. After multiple days of working with my carboard COVID, it had begun to bend and was a bit flimsy. Hence, I laser cut it on wood to be studier (as opposed to carboard the first round). I did it with 65 power and 10 speed.
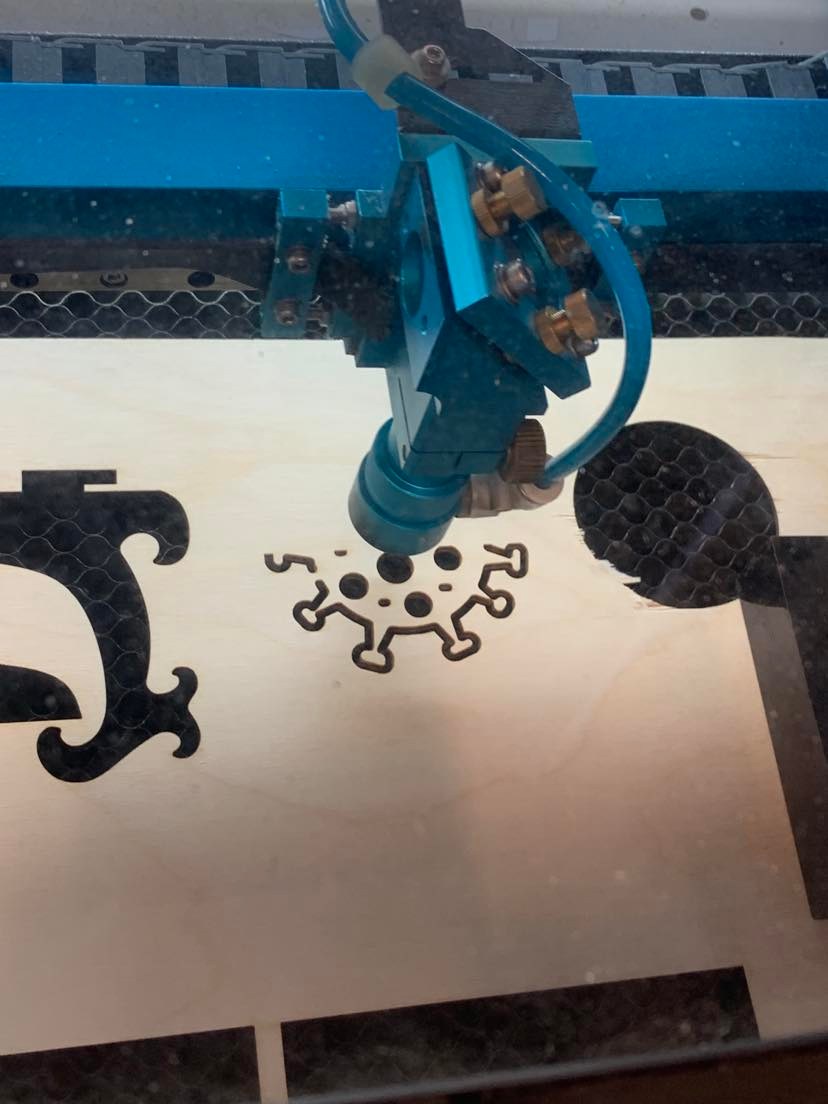
Here's what it looked like on the laser cutter!
In the future, if this works I would probably 3D print my COVID virus molecule so it could endure more impact.
Joints
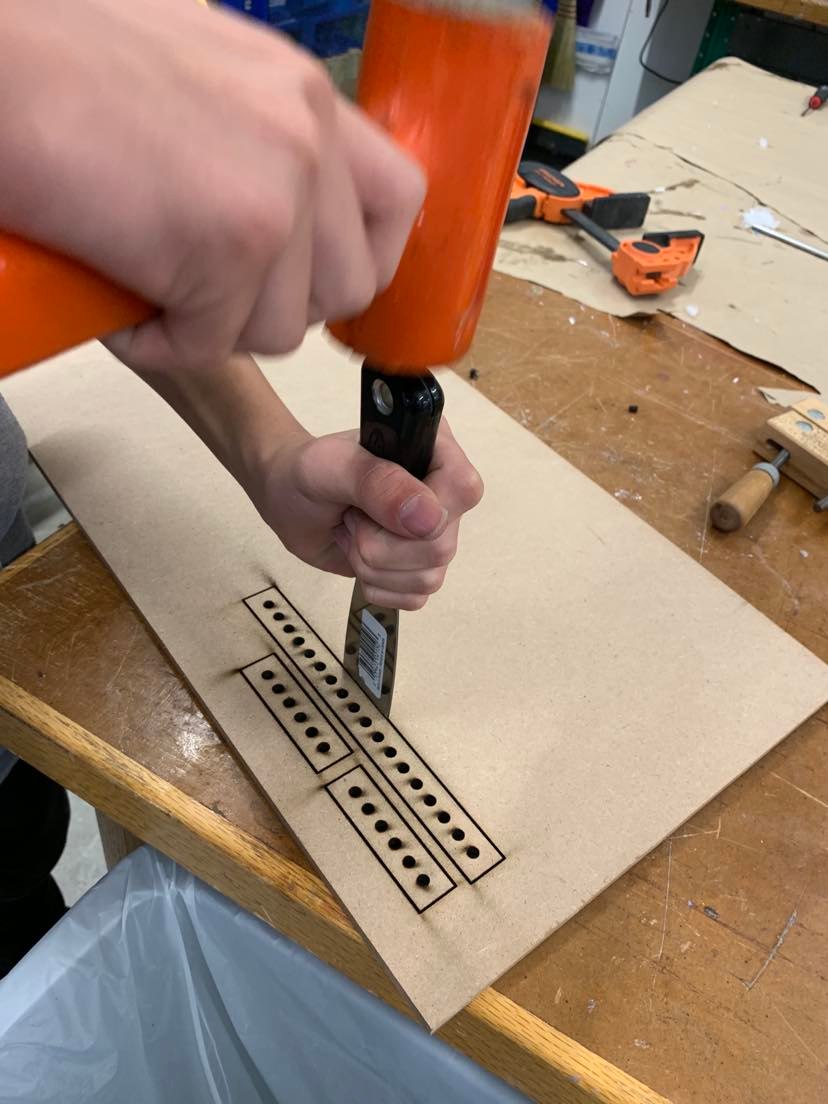
I then made a variety of different joints on the laser cutter. When I designed it on Fusion, I made sure it was compatible with M4 nuts and bolts. Moreover, to figure out the kerf, I had made the first few holes of my joints of varying widths on my Fusion file. Moreover, I made a lot of holes so I can experiment with the linkages and what would make the Corona successfully "pop" out the best. To note, initially, because I used this composite wood material, it was a bit hard to cut. Hence, I had to fish it out using the spreader like so:
Having a set of different linkages with holes along the way made it, and I'm glad I made that decision. They were also not that hard to design. I just had to make a rectangle and put equidistant circles across the rectangle. That way, I could ensure that the nuts and bolts were a snug fit to the linkage.
Also due to repeated testing, the wood began to get worn by the stepper motor. Hence, I 3D printed a joint out since that was less likely to be worn out. This joint was 70 by 20 mm with circles of a diameter of 5mm evenly spaced (10 mm apart frome each other).

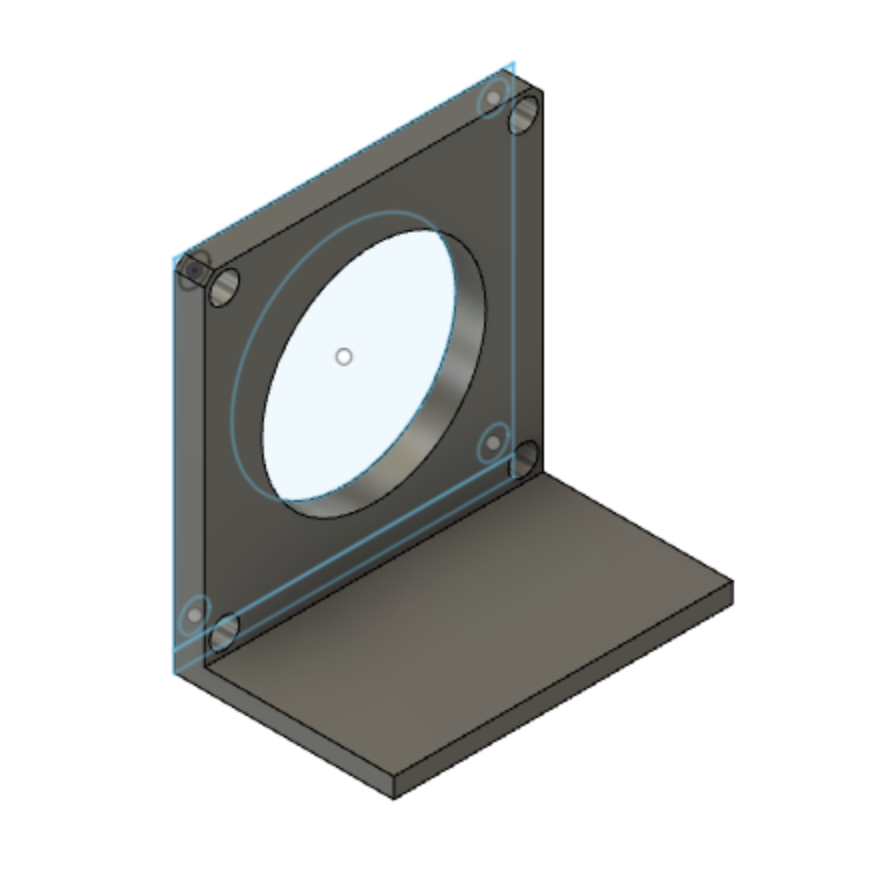
Linkage holder
Here is the design of the linkage holder itself. My little brother had suggested I 3D print that white piece to secure to the top panel rather than just directly secure the wood to the top panel (linkage holder) to make sure it's more secure especially since there's more surface area between the white piece and the top panel as compared to the wood and the top panel.
Here is the corresponding sketch that the linkage holder was extruded from. Essentially, I was able to get the measurements from measuring the thickness of the wood of the linkage I was attaching to it.
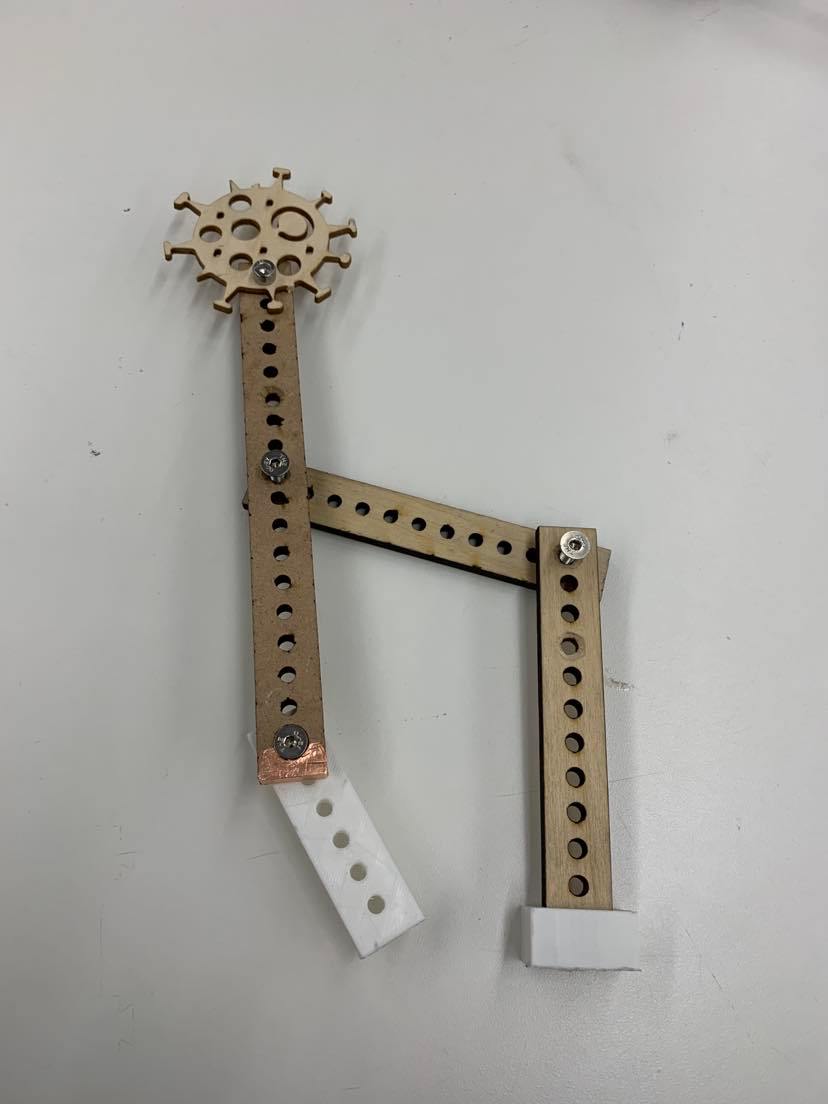
Assembled COVID and joints.
Essentially the way it works is that there would be a linkage with the coronavirus attached to it. This linkage would be attached to another bottom linkage, which would be secured to the the motor. Thus, when the motor turns, the coronavirus would be pushed up. In addition, I would have another linkage parallel to that bottom linkage
This was my first prototype. However, when I tested it out, the reach of the corona was too short.

Hence, I redesigned it to be like this instead, which had a good reach. (I also got rid of the double parallel bars to extend the reach)
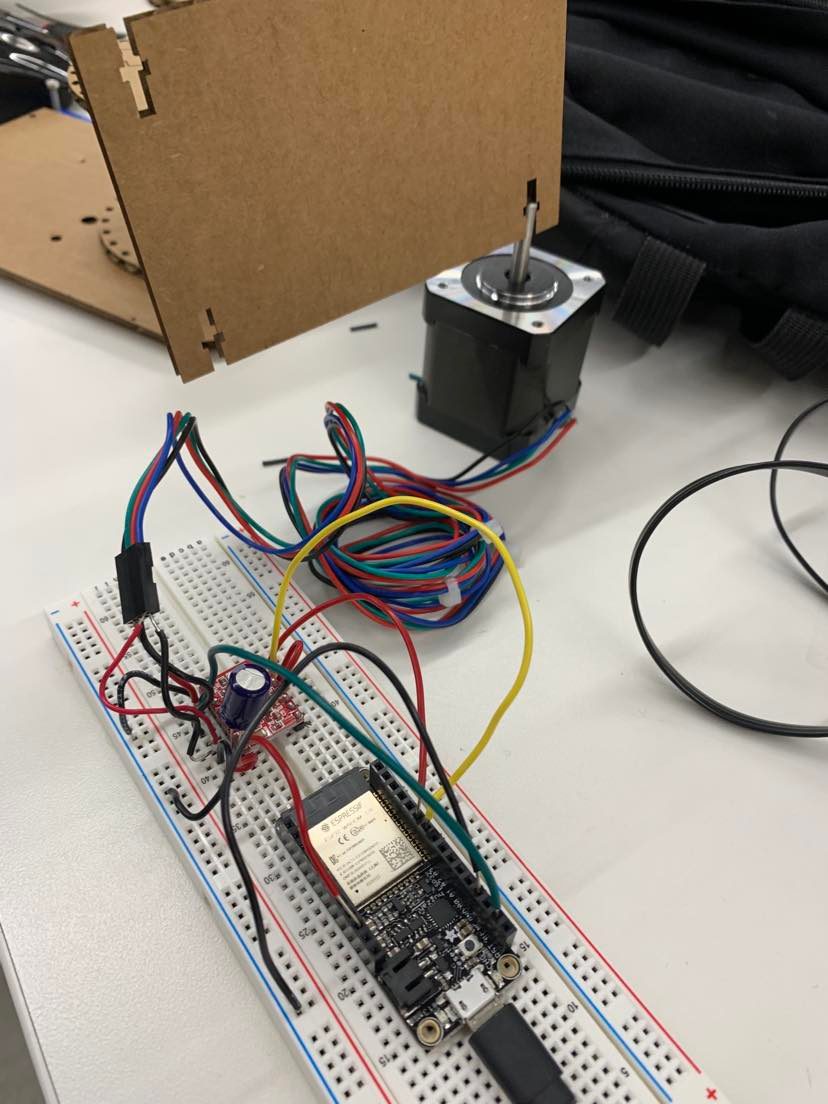
Stepper motor mount
My little brother was visiting me for Spring Break during this week and helped me design a stepper motor mount.
That way I could mount my Stepper motor to the bottom of my box without damaging the Stepper motor.
Main infrastructure
For the infrastructure itself, I decided to use cups for my first prototype. Essentially, I laser cut the top panel, which is wood with a slit for the coronavirus molecule to go through. I then glued the top onto cups that were taped onto each other.
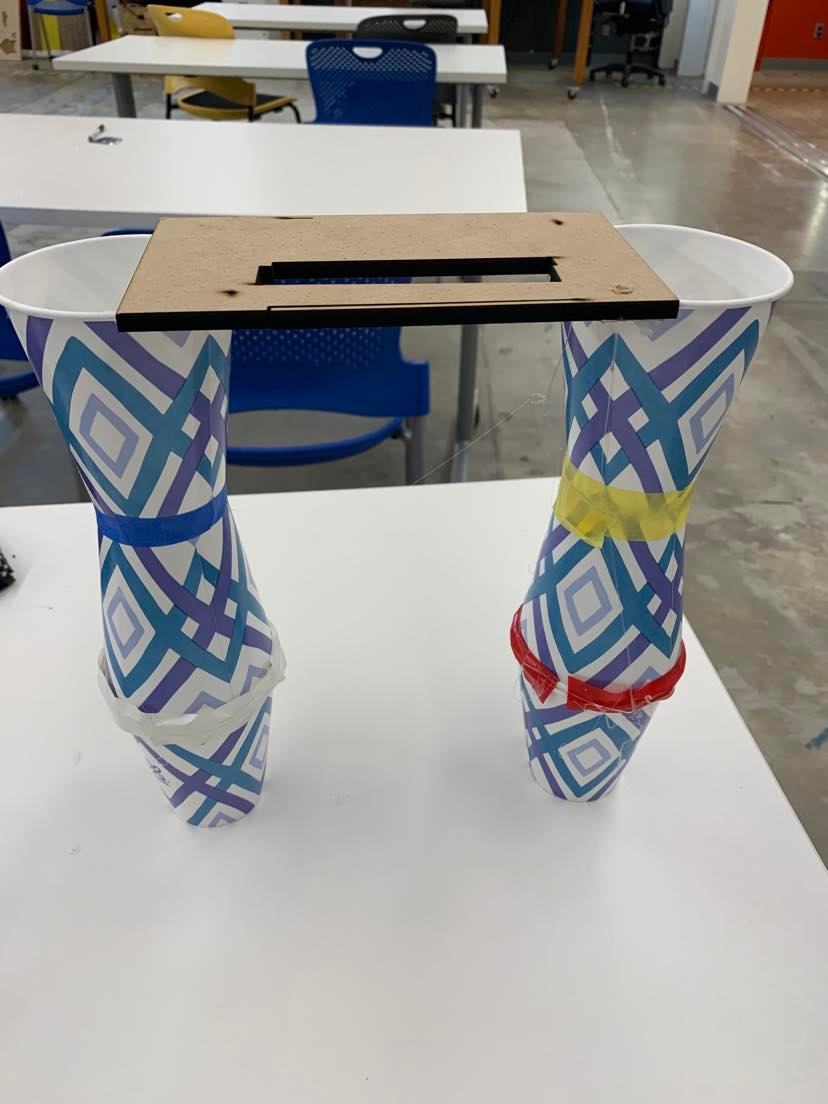
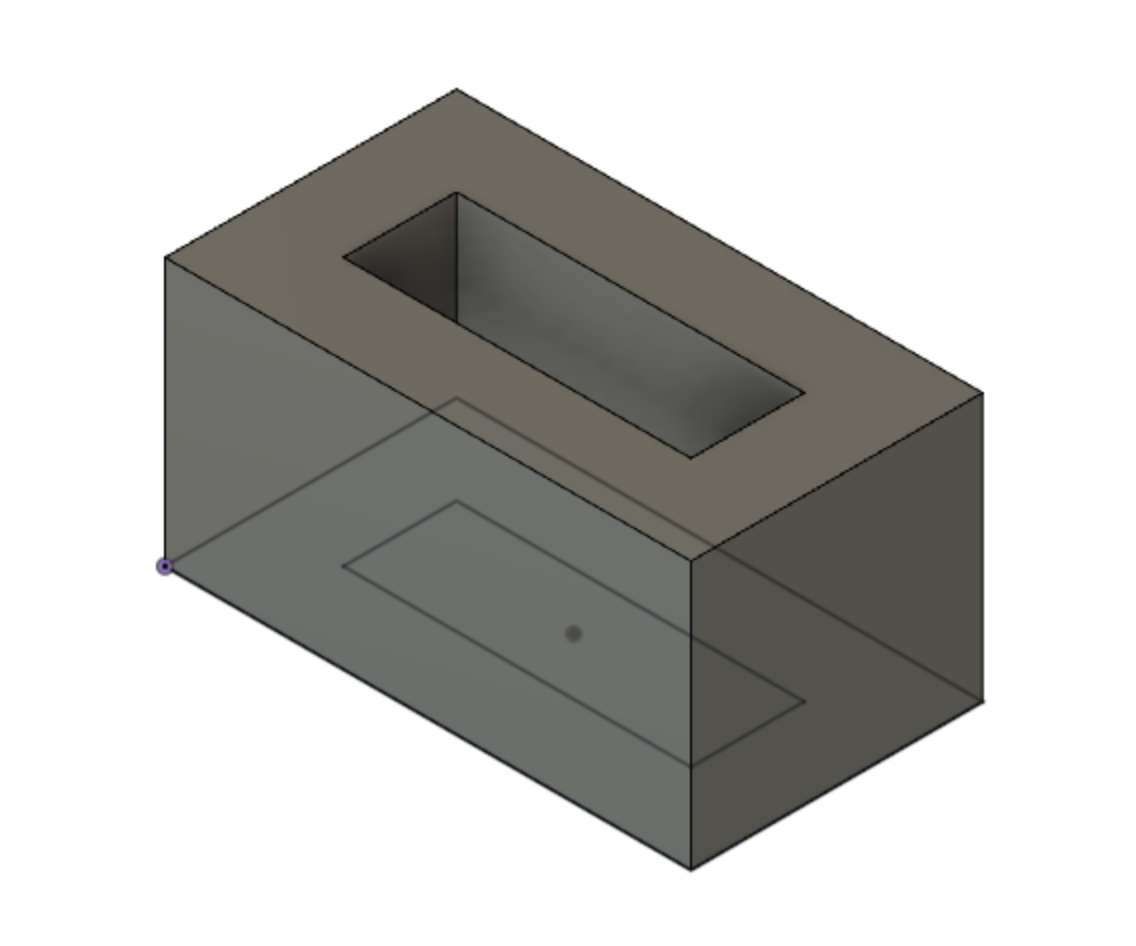
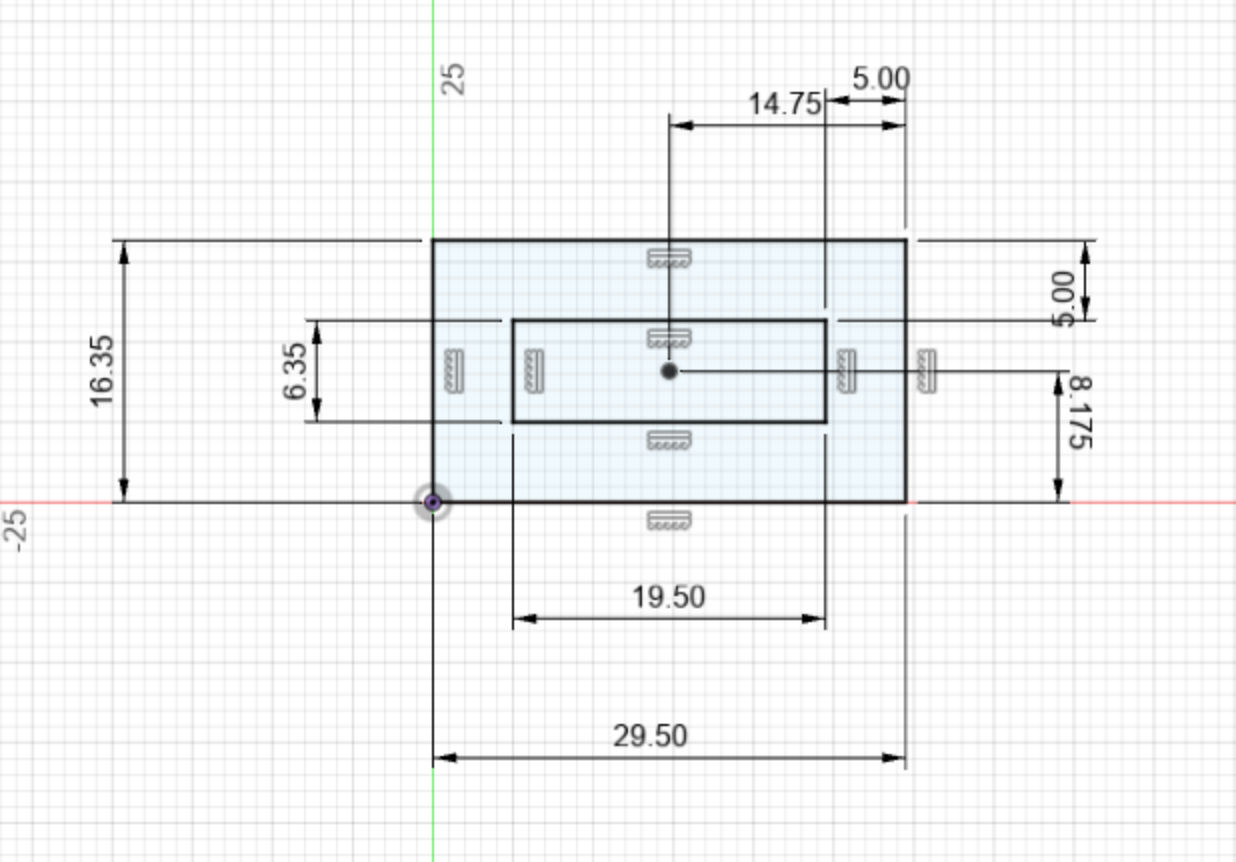
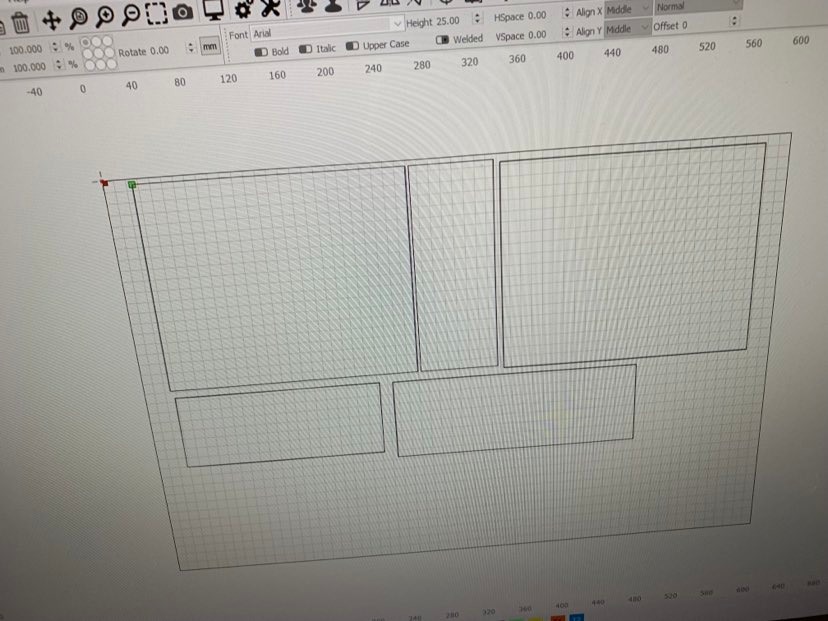
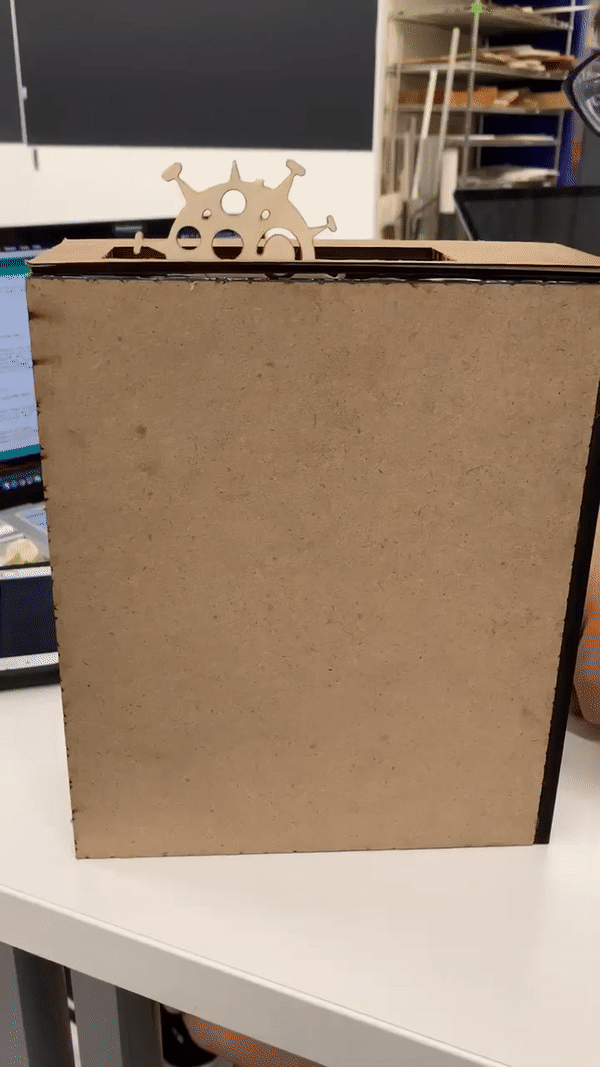
However, the base with the cups was two flimsy and kept on being toppled over. Hence, I decided to do something more secure. This made me decide to make a box for me to be able to put all the electronics. I measured the dimensions that I wanted for the box. I wanted the box to be 23.5 CM X 20 CM X 10 CM. I first ensured everything was up to par on Fusion. Then, I downloaded it as a dxf file and transferred it to the laser cutting software:
 .
.
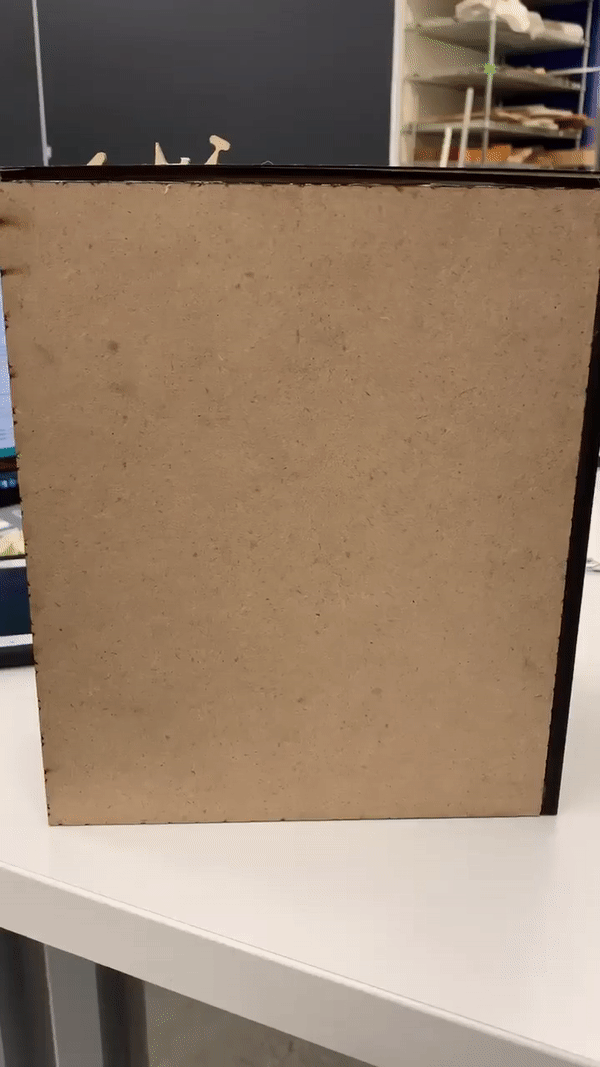
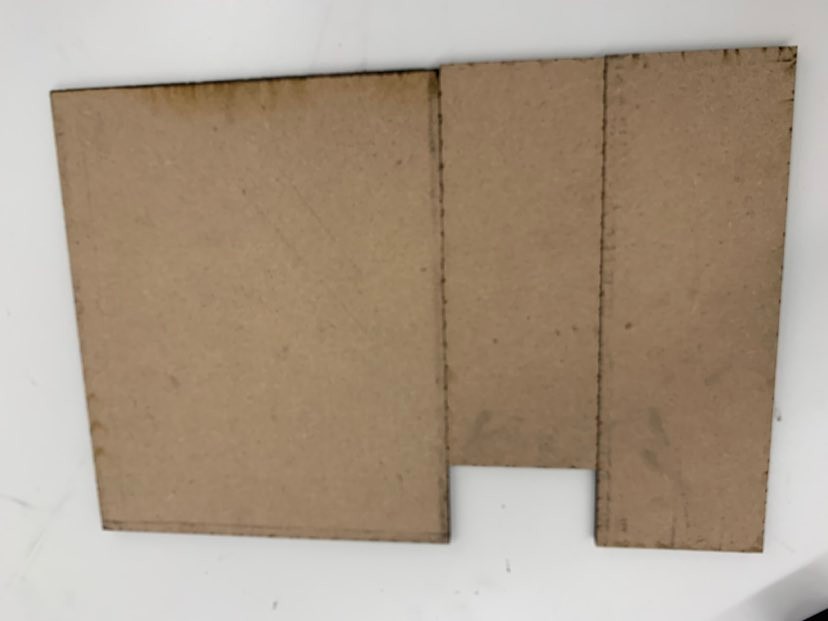
I originally wanted it to be cut out of acrylic instead wood so I could see the mechanism through an acrylic box. Unfortunatately, while making this project, we only had a little bit of continuous acrylic left--not enough to make my box. Hence, I ended up cutting the box with wood as the material
This is what it looks like after being cut:
 .
.
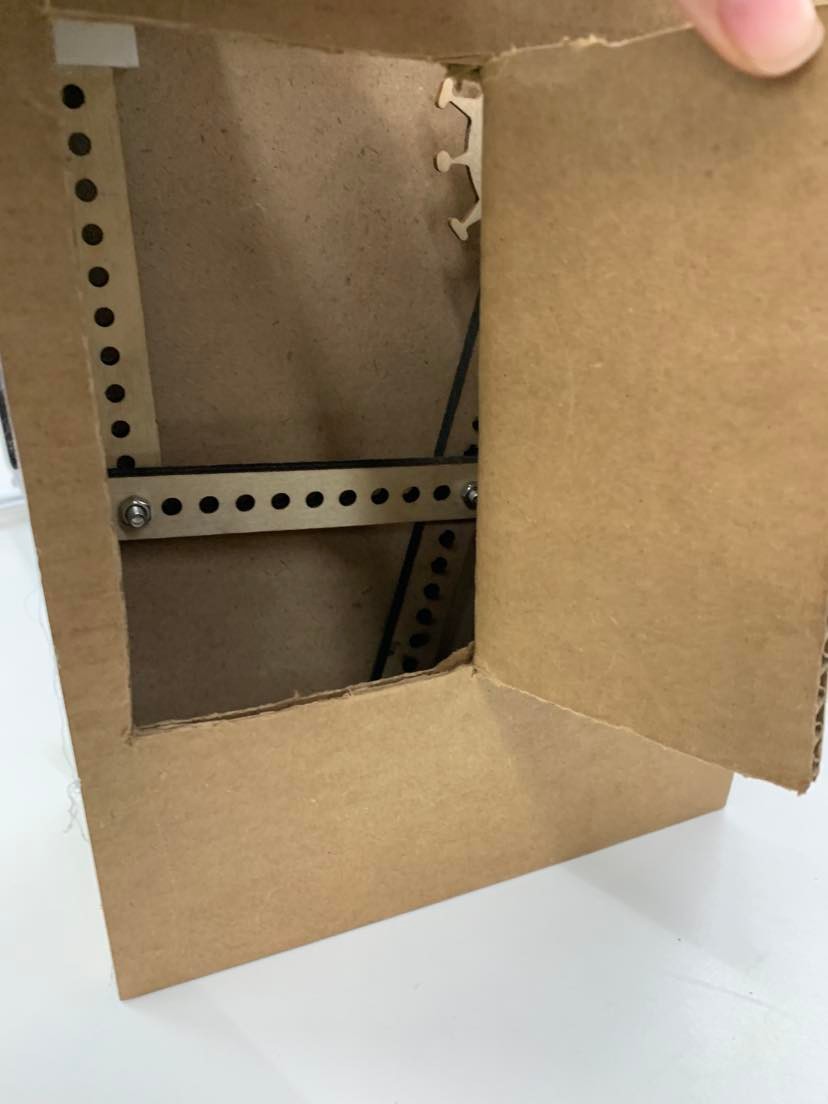
I cut the other half of the box out of carboard because at this point in time, we had actually unfortunately run out of wood. Moreover, the one benefit of having half of the box out of thick carboard is I could cut out a panel in the back for me to change things if needed. Essentially, a box cutter was used to cut this back panel, thus allowing me to look at the mechanism from the back and swap out parts if needed. I then cut the top panel with the slit separately.
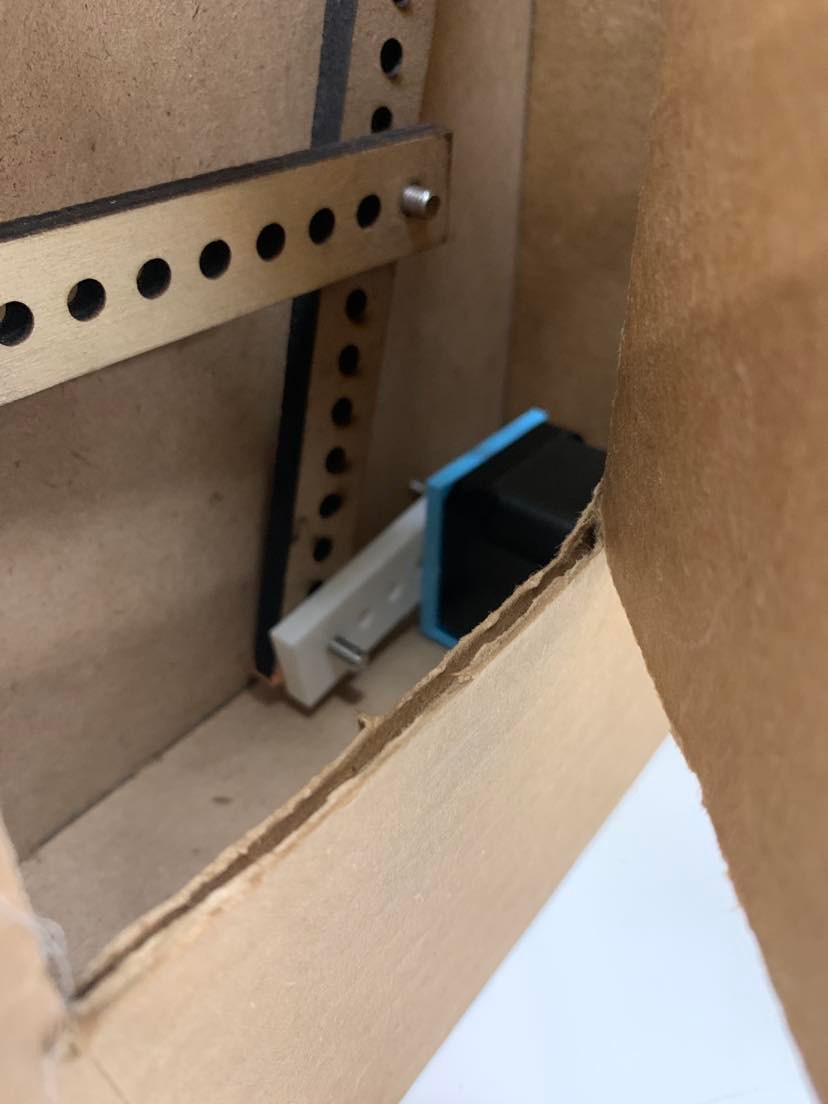
Here is what it looks like from the back, where I cut out a door panel for me to look inside:
 .
.
 .
.
As you can see from my cutout, I have a blue servo mount coupled with the first link, which is 3D printed. The rest of the linkages are wood. I made sure the ratio of the linkages were so that the Corona could peak out the hole on the top. In addition, to secure the whole contraption to the box, I had 3D printed something to hold the wood linkage and attach to the top panel. My little brother had suggested I 3D print that white piece to secure to the top panel rather than just directly secure the wood to the top panel (linkage holder) to make sure it's more secure especially since there's more surface area between the white piece and the top panel as compared to the wood and the top panel.
Code
To see how rapid something was moving/better picture the movement of the code, I attached a piece of cardboard ot the shaft of the motor.
That way, when the motor turns, I was able to better picture what was going on.
I initially adapted the code we used in lab by altering the duration of the delay to be shorter.
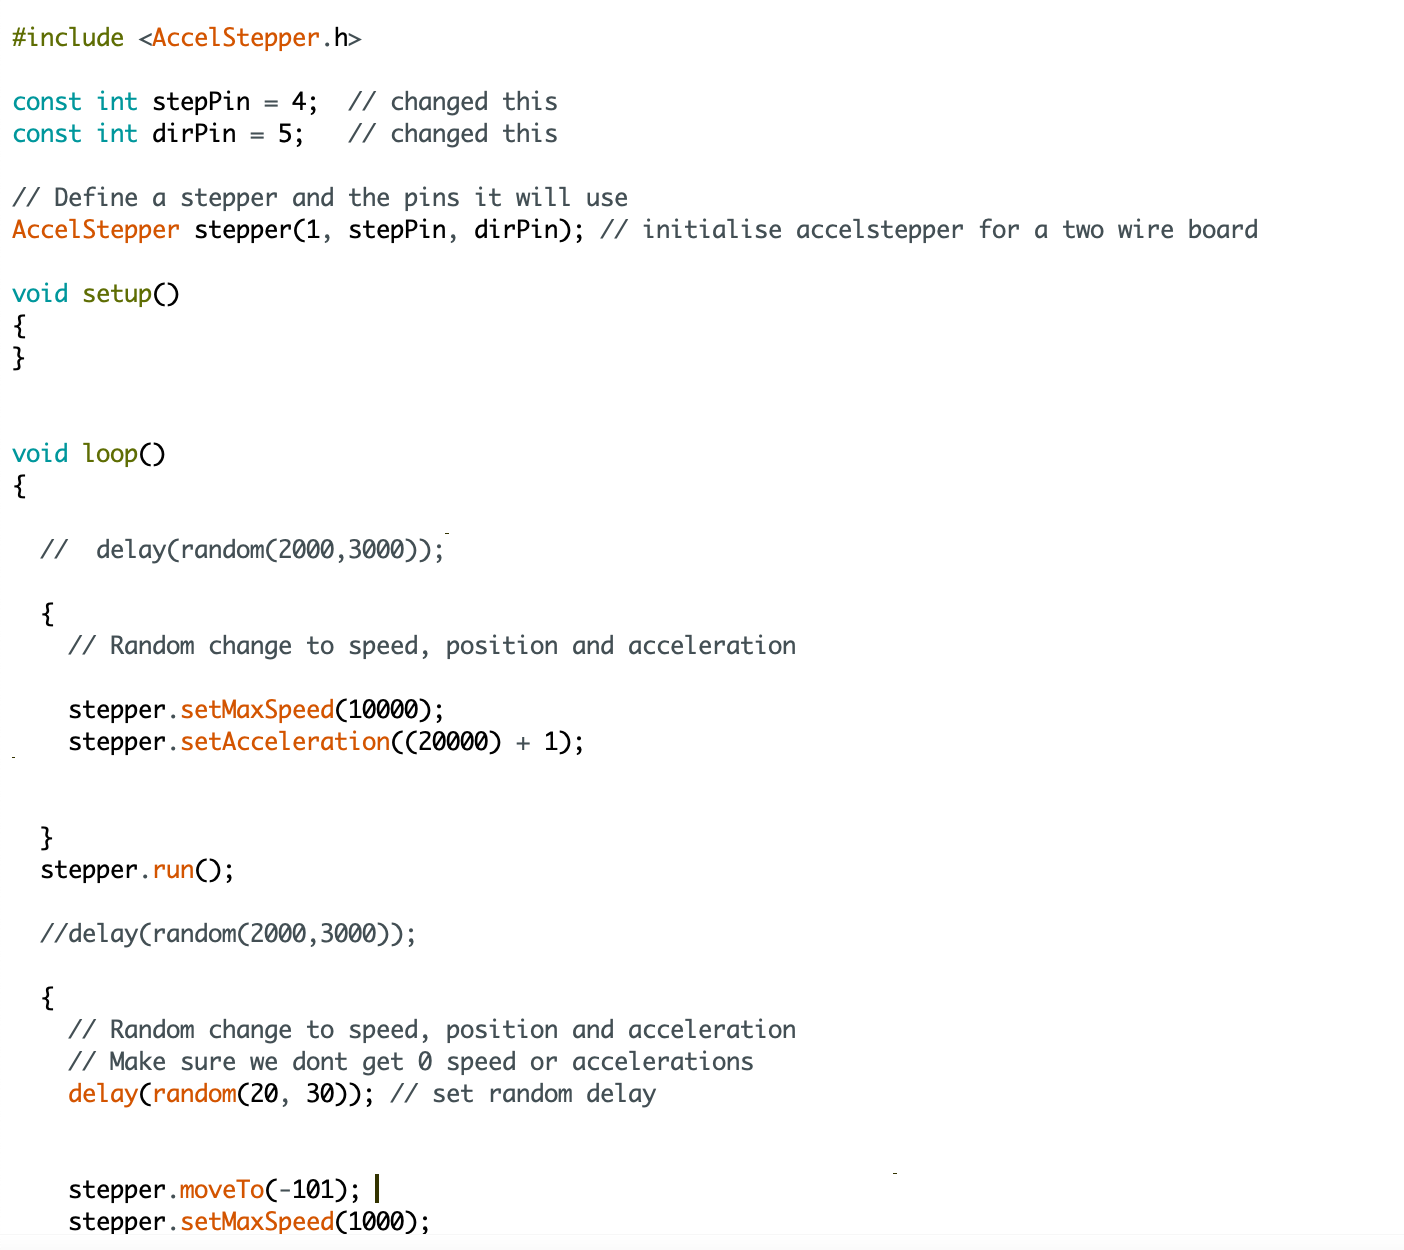
However, I realized a fundamental flaw: for a whack-a-covid, we don't: want to know when the COVID will rise up. Much like covid, it surprises us when it comes up.
Hence, I decided to write this other code, piecing together components of different sample code, testing it, and making sure it works.
 .
.
In terms of my testing process, I wanted when the COVID to pop up to be random. In addition, the COVID molecule needs to be able to come through the slit at the right angle and right position.
I essentially wanted the COVID to move up and then move down. I experimented with where to put the delay, as well as the right speed to have it. To make the stepper motor go down, I had to experiment with the position to be the "down" position. -101 worked well for me as the "down" position.
Modifications
The stepper motor kept vibrating too much, so I decided to connect my circuit to a stronger external battery (9V) to see if that would help things. It did not. Thus, I tried a couple of Stepper motors until I found one that was much more smooth and didn't shake as much.
Repeatable results
I was able to calibrate it to get repeatable results through the securement of the stepper motor onto the bottom with the mount and the attachment to the top panel with a 3D printed piece. Moreover, my first linkage piece was also 3D printed (whereas my other pieces were in wood) to make sure it wouldn't get worn off as much. Thus, there were multiple points of securement. Moreover, by designating the exact position to be the resting position and telling my COVID to get to the resting position through the code, it returns to the same location each time. Hence, here's another clip of it doing it again.
 .
.
Reflections
As you can see, this project took took lots of trial and error and testing. I was ultimately very satisfied with my work for this project. It was super cool to work further with electronics and working with Stepper motors, which I haven't worked with before. Especially since stepper motors are more precise/has smooth motion, I'm excited to have learned how to use it. Working with a stepper motor was a little finicky though, so now I know the benefits/cons of using a stepper motor. Future steps include attaching a capacitative sensor at the bottom of the box, that way lights or something could flash when the corona virus touches the bottom of the box.