Week 5: 3D printing
Background
This week, I used the protein modeling software PyMol to alter protein structure design and obtain the file that I could feed into the 3D printer to print out a model of Pgm1, an ATP-grasp enzyme that has similar functions to one of the proteins I currently investigate.
I wanted to work on 3Dp printing proteins/figure out a workflow to do so because it is clearly something that should not merely be laser cut. The grooves and edges of proteins are highly specific, which would benefit from the protein.
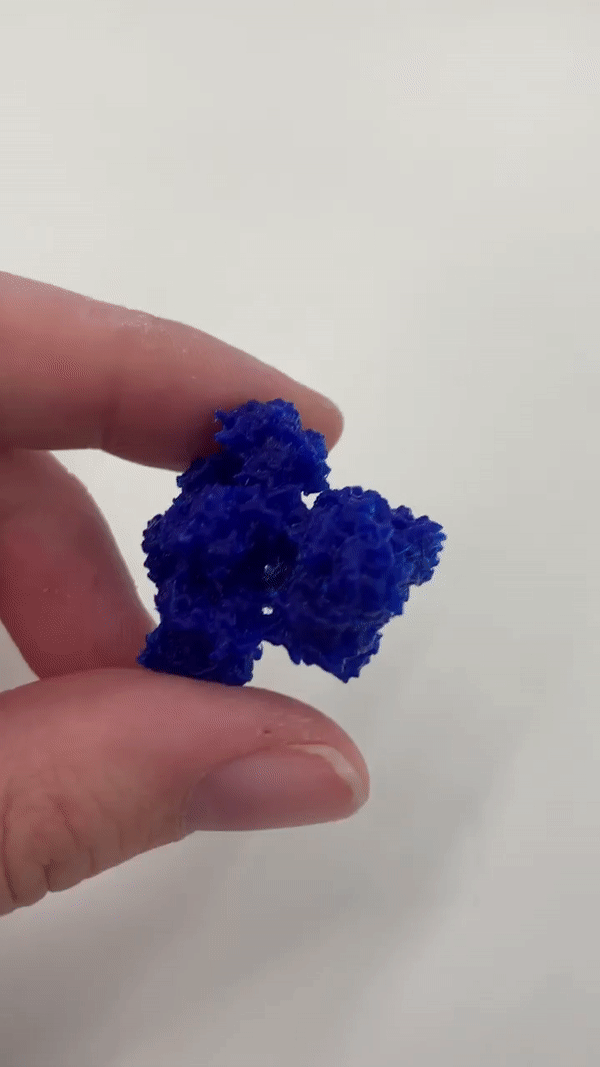
For reference, here is what the final structure looks like:
After my initial print and figuring out specifics of printing out proteins (for instance, to use surface view rather than cartoon view), I also used Fusion360 to take it to the next step, designing protein structure jewwelry.
Using Pymol
Pymol is a protein modeling software that I used to make the different views of the protein.
Pymol operates based off of python (hence the "Py"). With key commands, I can change the visualization of the protein. First, I retrieved the protein I wanted. To do this, I typed in ("fetch 3wvq"). 3wvq corresponds to Pgm1; I was able to know what the protein structure code was by referencing the paper "A peptide ligase and the ribosome cooperate to synthesize the peptide pheganomycin."
After fetching, I then hid the nonbonding aspects of the protein structure by typing in "hide nonbond" into the command line. That way these components (free circles that depict water) wouldn't show up in my final product.
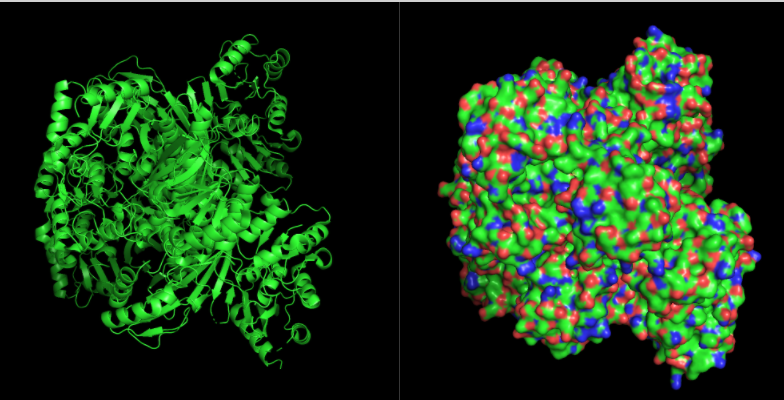
I created two views:
- Cartoon view (left). Thhis shows the secondary structure (helices, beta sheets, etc).
- Surface view (right). This shows the surface of the protein/the space that the protein occupies.
I clicked Show --> as --> cartoon for the cartoon version and Show --> as --> surface for the surface view.
Lastly, I saved these two files as STL files.
Using Prusa Slicer Software and Printing
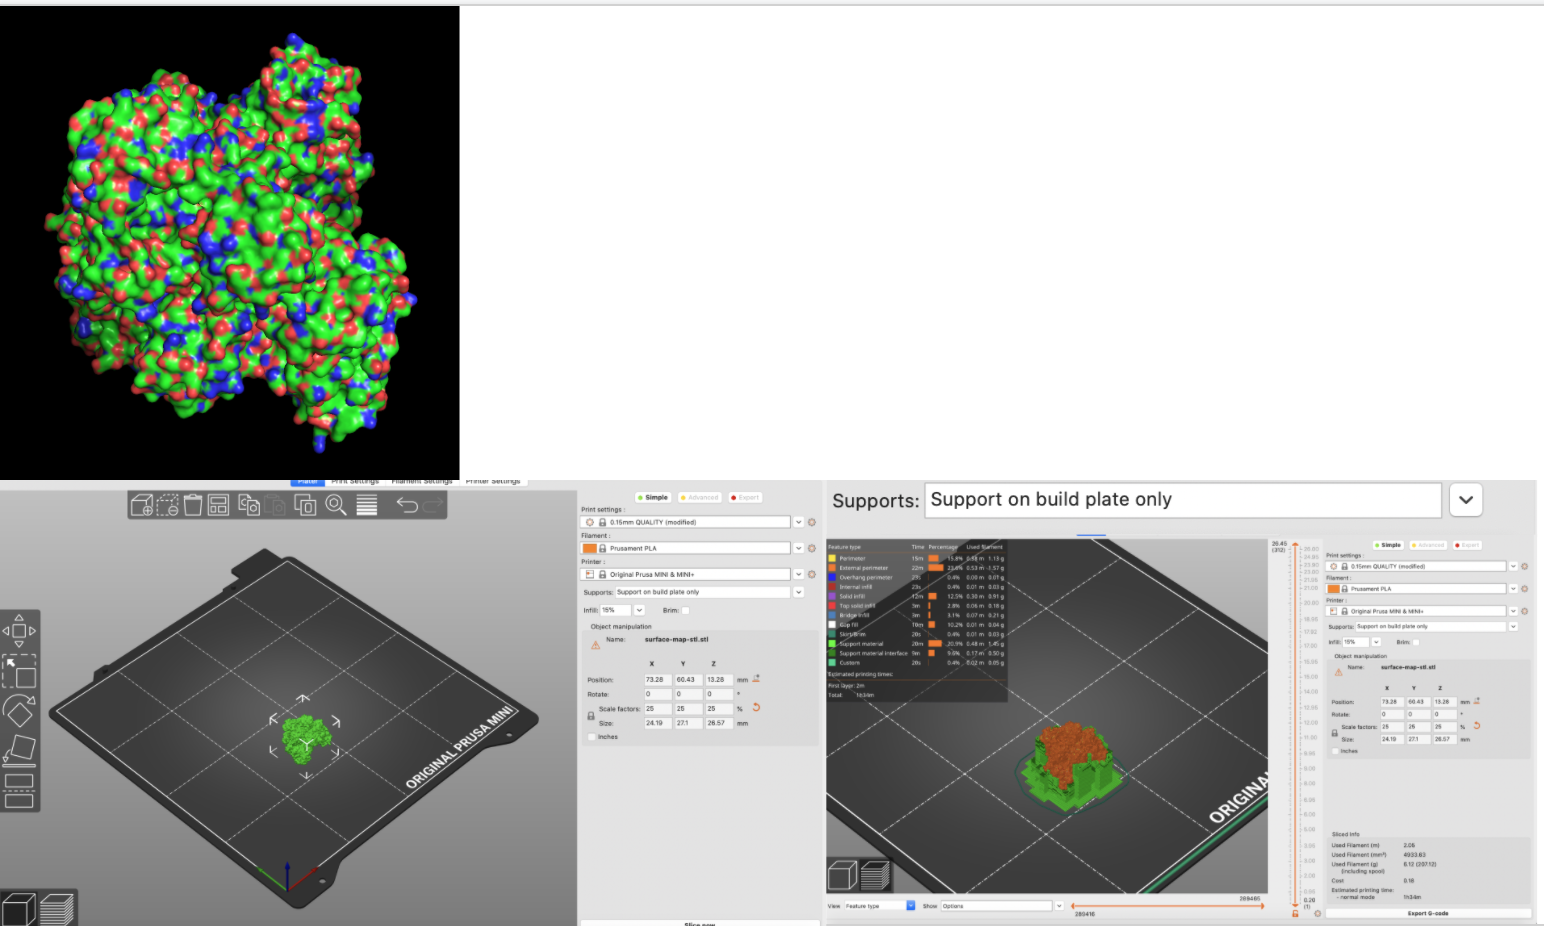
I first used the cartoon version. I uploaded the STL file onto the Prusa Slicer (which was configured to the specific printers we had). Then, I scaled the protein down to 25%. Since there was some overhang, I decided to use the "support on build plate only" feature before pressing "slice now" to generate the Gcode.
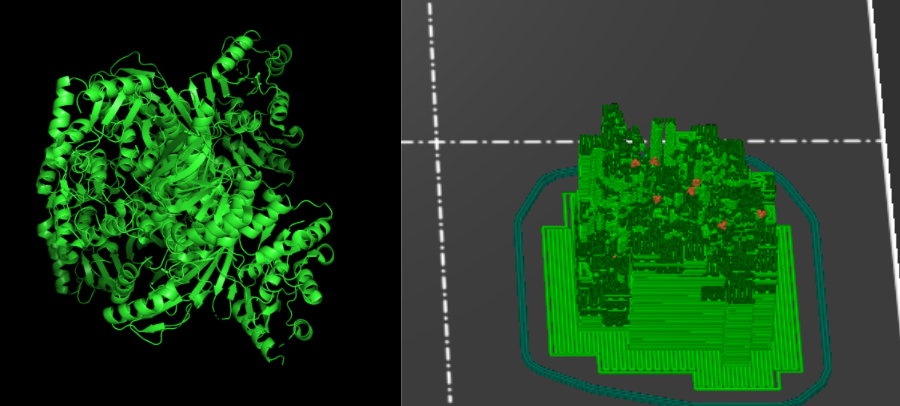
the problem with the cartoon print is, if you look closely, there's a lot of structural support needed, which would be harder to remove, especially since some of the support seems to be sticking into the protein due to the gaps present in the cartoon view due to the gaps between secondary structures.
Hence, I decided to test the surface view instead since there's less gaps within the protein structure itself and it focus on the exterior surface; hence, more of the protein is connected.
Again, I scaled down the file to 25%. I made sure to rotate it to maximize the surface touching the bottom. Afterwards, I added supports on bottom plate. This looked a lot better (in the image below) than the cartoon view.
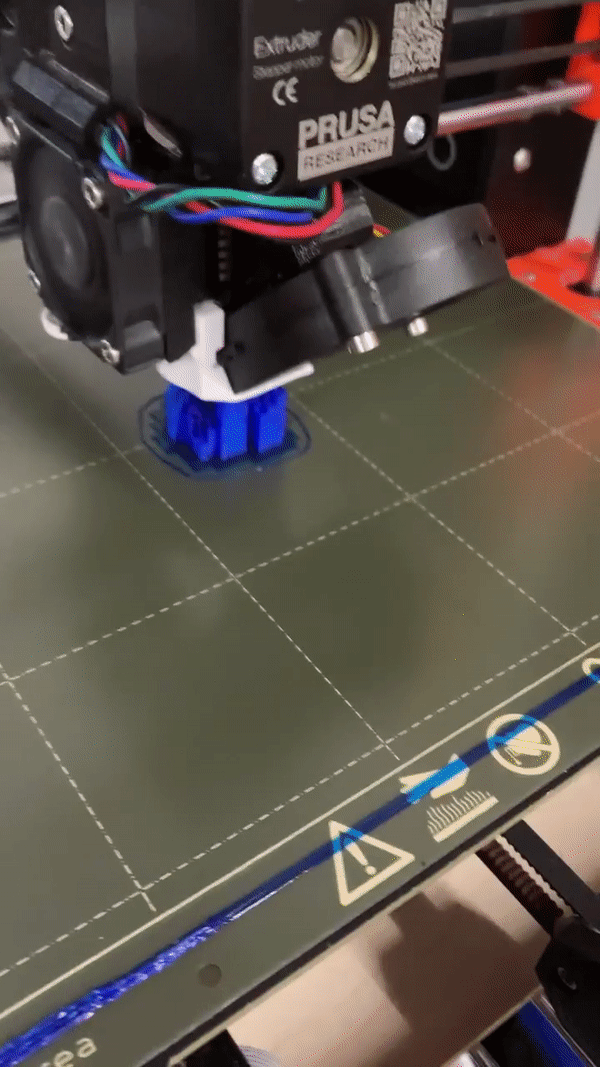
I then had to uplod the Gcode onto the SD card. To do so, I downloaded it on my USB, and then used the computer for the vinyl cutter to transfer the file from my USB to the SD card since the computer for the vinyl cutter had a SD card slot.
Afterwards, I inserted the SD card into the 3d printer. Estimated time was 1h 40 minutes
Here is a gif of it printing:
Post-processing
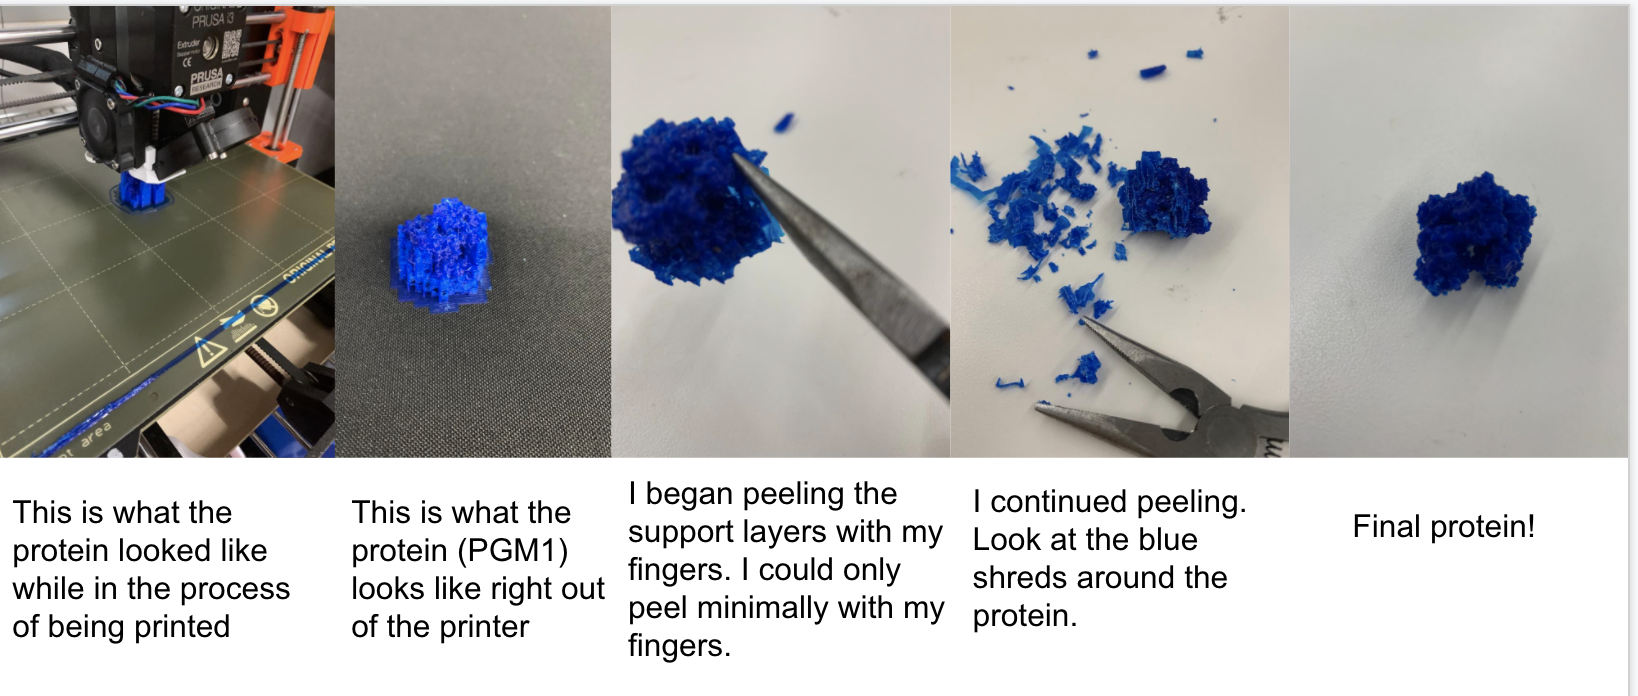
This pictorial I made basically sums it up. One other note is that to remove the model from the 3d printer, I used my fingers to yank it up when cool. This left a blue ring on the plate, which was easy to remove and through into the waste bin.
Designing (with fusion) protein jewelry
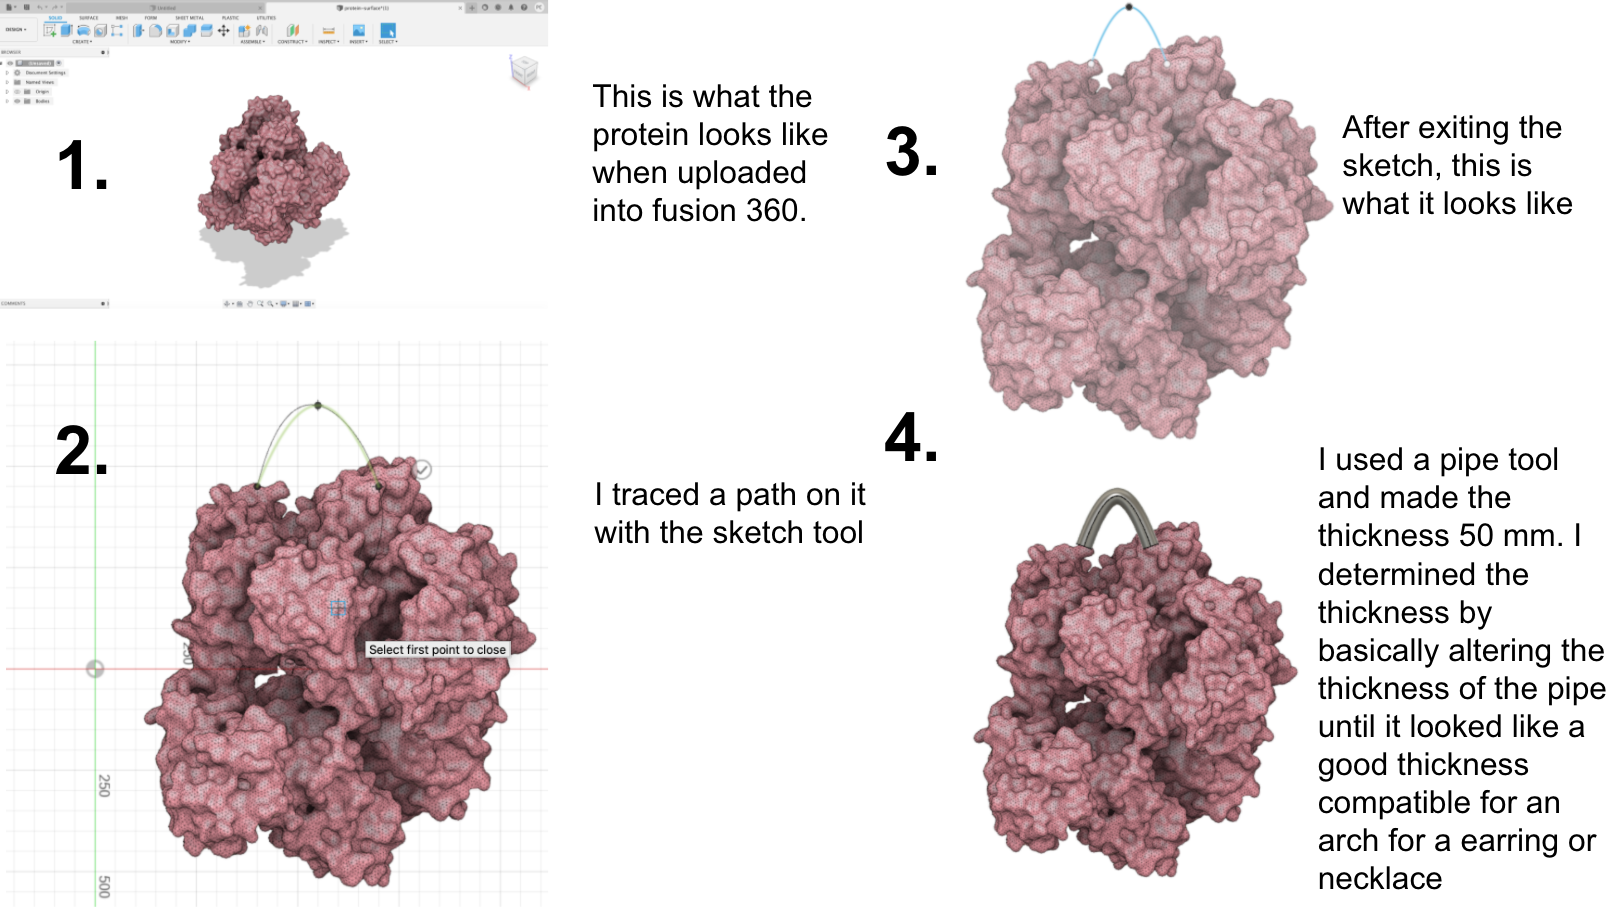
After this successful print of my protein and with the knowledge of what to do with it (i.e. it's easier to print a surface view than a cartoon view), then I used Fusion 360 to make protein jewelry.
To note, after obtaining the proper STL file from PyMol, I imported it into Fusion 360. For some reason, I wasn't able to import the cartoon view, but that doesn't really matter since I wanted to use the surface view anyways.
I then learned how to use the "pipe tool." First, I drew a path that connected to my protein by using the sketch tool. Then, after pressing "finish sketch," I got to the main page and I then rotated the structure around my laptop to make sure the "pipe" was connected to my protein.
This is a helpful tutorial on how to use the pipe tool on fusion: https://www.youtube.com/watch?v=n66_V8TveiM (opens in a new tab)
This is something I could print out in the future.
Final project progress
Moreover, this week, I also started thinking more about my final project; I emailed some toilet scientists about project ideas, as well as am connecting with a former PS70 alum who worked on something toilet related.
Some ideas include improving upon the sensors on hands-free flush toilet; however, I thought this was a already "solved" problem so wasn't super excited about it.
Nishi and I have a meeting scheduled for monday, which I am excited to attend.
Moreover, part of why I worked on a protein this week was because a backup idea is to show a mechanism within proteins, for isntance amide bond hydrolysis.
Scanning
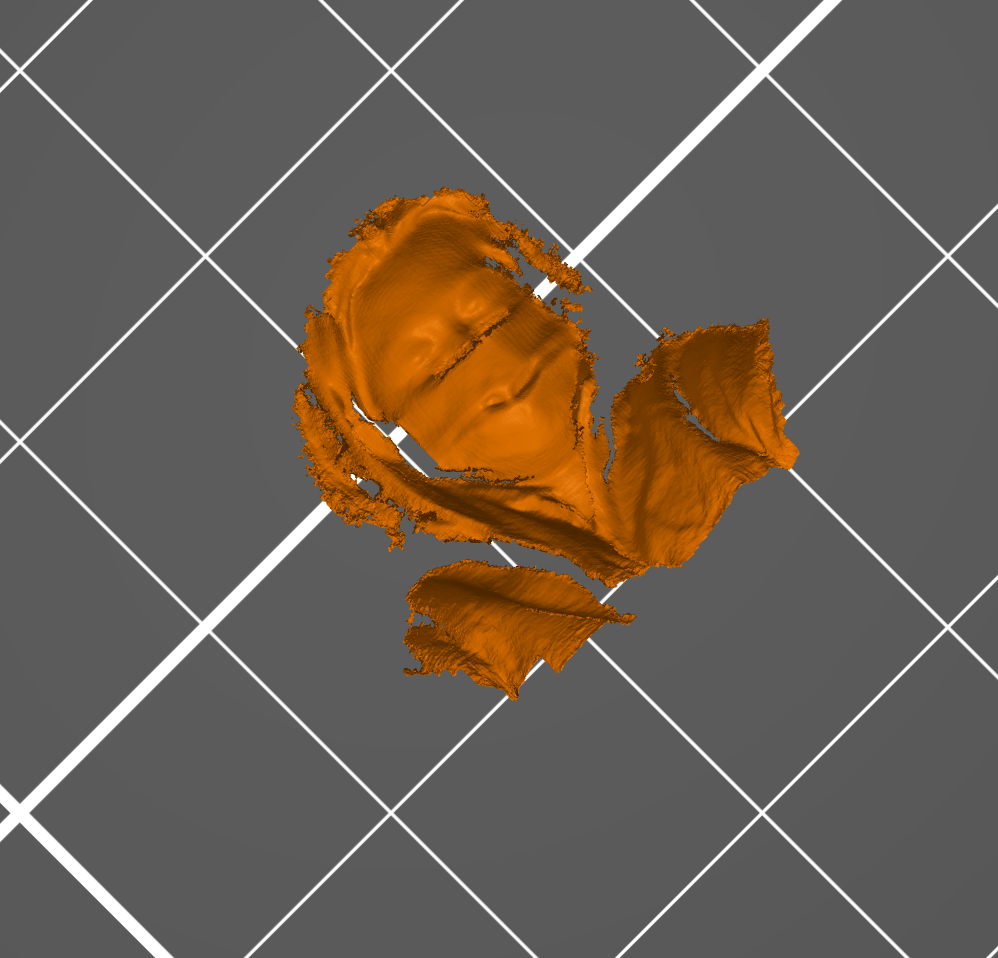
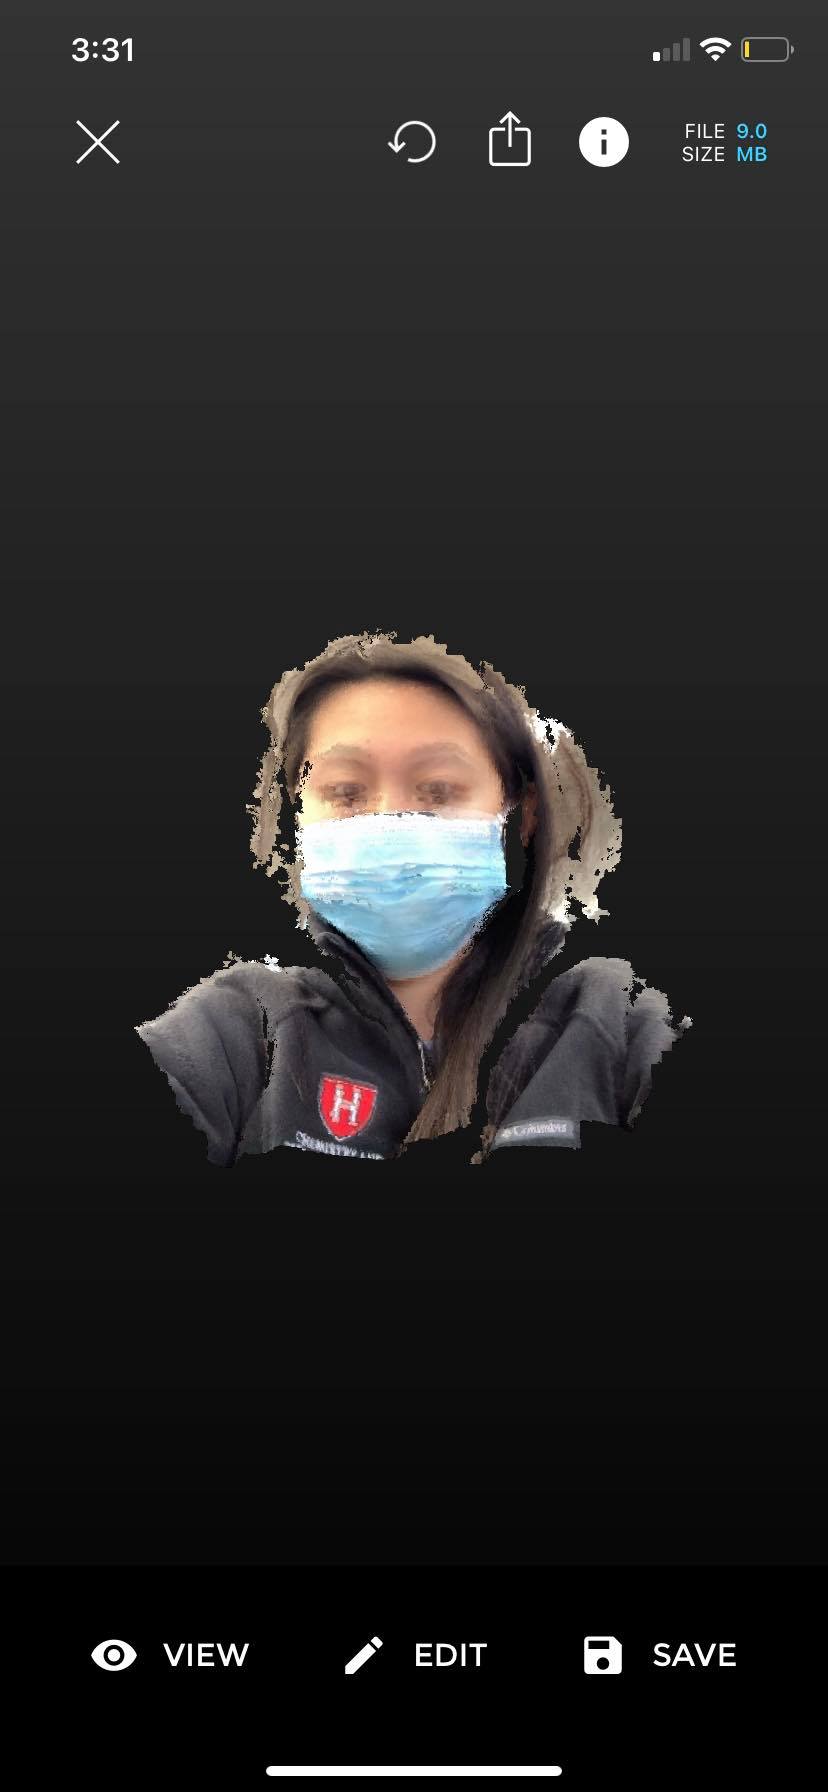
I tried using a phone app called "ScandyPro." I wanted to use a phone app because I am excited to scan objects conveniently, including ones that I see in everyday life. I found ScandyPro by doing a few google searches.
I scanned my face! To do that, I used the front camera. As you can see with the first image, like it looked really creepy and there were a couple of holes. I tried scanning it a couple of times, but that one still looked the best. I then uploaded it onto Prusa Slicer. I scaled it up (200%) and you can see that you can see the depth of my face and mask etc (although it still looks creepy haha)
Reflections
It was super cool to work with proteins. I have never touched or felt a 3d printed version of a protein--I've always just seen computational models, so this was super duper cool. Proteins, with all its intricacy, could not be properly represented in a 2d structure. Hence, it's amazing that it could be 3D printed out. I also like the idea of making it into wearable jewelry, which could be made using the pipe tool!